(코틀린 kotlin) 알람 앱
aop-part3-chapter03 - 알람앱
목차
- 인트로 (완성앱 & 구현 기능 소개)
- 레이아웃 작성하기
- 알람 설정 화면 구현하기
- AlarmManager 을 사용하여 알람 등록하기
- AlarmReceiver 구현하기
- 아웃트로
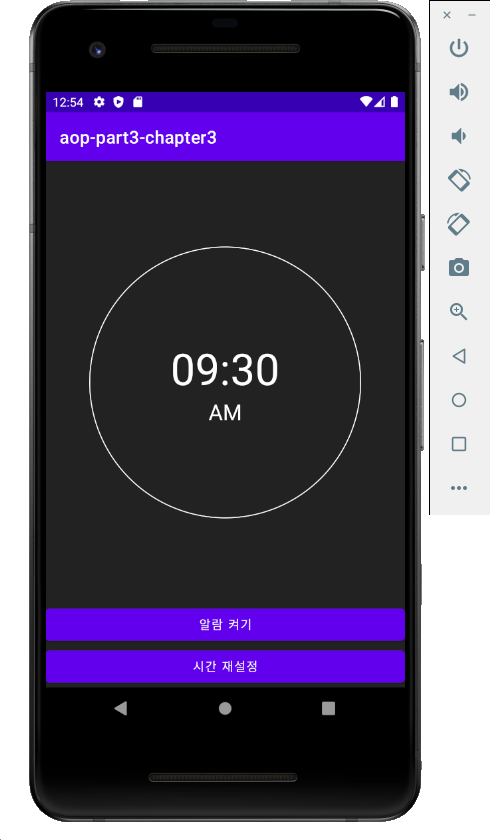
결과화면
이 챕터를 통해 배우는 것
- AlarmManager 사용하기
- Notification 사용하기 (파트3, 챕터1 복습)
- Broadcast receiver 사용하기
Background 작업
- Immediate tasks (즉시 실행해야하는 작업)
- Thread
- Handler
- Kotlin coroutines
- Deferred tasks (지연된 작업)
- WorkManager
- Exact tasks (정시에 실행해야 하는 작업)
- AlarmManager
AlarmManager
- Real Time (실제 시간) 으로 실행시키는 방법
- Elapsed Time (기기가 부팅된지부터 얼마나 지났는지) 으로 실행시키는 방법
알람앱
지정된 시간에 알람이 울리게 할 수 있음.
지정된 시간 이후에는 매일 같은 시간에 반복되게 알람이 울리게 할 수 있음.
1. AlarmManager 사용
AlarmManager 통해 정해진 시간에 알람을 받을 수 있다. App이 실행 중이 아닐 때라도 정해진 시간에 이벤트를 받아 어떤 작업을 처리할 수 있다.
Alarm의 특징은 다음과 같다.
- 지정된 시간에, 일정 간격마다 App이 알람 이벤트를 받도록 설정할 수 있습니다.
- 이벤트는 인텐트를 의미하며, 보통 BroadcastReceiver로 인텐트가 전달됩니다.
- AlarmManager가 이벤트를 보내기 때문에, 내 App이 실행 중이 아니더라도 알람을 받아 어떤 작업을 처리하도록 구현할 수 있습니다.
ㅁ 1회성 알람 등록
알람을 특정 시간에 한번만 받도록 설정할 수 있다. 알람을 받았을 때, 다시 알람을 등록한다면 반복적으로 알람을 받을 수 있다.
알람 이벤트는 브로드캐스트로 전달된다. 먼저 아래와 같이 BroadcastReceiver를 만들어야 한다. 인텐트를 받으면 Notification을 띄우도록 구현하였다. Android Oreo 이상부터는 Notification을 띄울 때 먼저 channel을 등록해야 한다. createNotificationChannel()는 채널을 등록하는 코드이다. 채널이 등록되면 notifyNotification()으로 노티피케이션을 등록한다.
class AlarmReceiver :BroadcastReceiver(){

    companion object{
        const val NOTIFICATION_CHANNEL_ID = "1000"
        const val NOTIFICATION_ID = 100
    }

    override fun onReceive(context: Context, intent: Intent) {
        createNotificationChannel(context)
        notifyNotification(context)
    }

    private fun createNotificationChannel(context: Context){
        if (Build.VERSION.SDK_INT >= Build.VERSION_CODES.O){
            val notificationChannel = NotificationChannel(
                NOTIFICATION_CHANNEL_ID,
                "기상 알람",
                NotificationManager.IMPORTANCE_HIGH
            )

            NotificationManagerCompat.from(context).createNotificationChannel(notificationChannel)
        }
    }

    private fun notifyNotification(context: Context){
        with(NotificationManagerCompat.from(context)){
            val build = NotificationCompat.Builder(context, NOTIFICATION_CHANNEL_ID)
                .setContentTitle("알람")
                .setContentText("일어날 시간 입니다.")
                .setSmallIcon(R.drawable.ic_launcher_foreground)
                .setPriority(NotificationCompat.PRIORITY_HIGH)
            notify(NOTIFICATION_ID, build.build())
        }
    }
}
마지막으로 내가 만든 리시버를 다음과 같이 AndroidManifest.xml에 등록해야 한다. exported속성을 false로 설정하면 리시버는 내 앱으로부터 전달되는 인텐트만 받을 수 있다. true로 설정하면 다른 앱으로부터 전달되는 인텐트도 수신하게 된다. 다른 앱으로부터 이벤트를 받지 않기 때문에 false로 설정하면 된다.
<receiver android:name=".AlarmReceiver"
    android:exported="false">
알람 등록
private fun initOnOffButton(){
        val onOffButton = findViewById<Button>(R.id.onOffButton)
        onOffButton.setOnClickListener {
            Log.d("this", "it.tag : ${it.tag}")
            val model = it.tag as? AlarmDisplayModel ?: return@setOnClickListener// 형 변환 실패할 수 있으므로 ?

            val newModel = saveAlarmModel(model.hour, model.minute, model.onOff.not())
            // 데이터를 확인한다.
            renderView(newModel)
            Log.d("this", "Model : ${newModel}")

            if(newModel.onOff){
                // 꺼진 경우 -> 알람을 등록
                val calendar = java.util.Calendar.getInstance().apply {
                    set(Calendar.HOUR_OF_DAY, newModel.hour)
                    set(Calendar.MINUTE, newModel.minute)

                    if(before(java.util.Calendar.getInstance())){ // 지금 시간 보다 이전이다. 하면 다음날로 미뤄줌 !
                        add(Calendar.DATE, 1)
                    }
                }
                val alarmManager = getSystemService(Context.ALARM_SERVICE) as AlarmManager
                val intent = Intent(this,AlarmReceiver::class.java)

                val pendingIntent = PendingIntent.getBroadcast(this, ALARM_REQUEST_CODE,
                intent,PendingIntent.FLAG_UPDATE_CURRENT)

                // alarmManager.setExactAndAllowWhileIdle() // 안드로이드 잠자기 모드에서도 실행 할 수 있는 메소드

                alarmManager.setInexactRepeating( // 정시 실행하여 반복하는 기능 API 핵심 기능 !! setInexactRepeating 비교적 비정확함,
                    // 알람 매니저는 비교적 정시에 실행해야하는 앱에서 사용 !
                    AlarmManager.RTC_WAKEUP, // 부팅된 시간이후로 하는 값 : ELAPSED_REALTIME_WAKEUP
                    calendar.timeInMillis,
                    AlarmManager.INTERVAL_DAY, // 하루에 한번씩 pendingIntent 실행 !
                    pendingIntent
                )
            }else{
                // 켜진 경우 -> 알람을 끔
                cancelAlarm()
            }
            // 온오프에 따라 작업을 처리한다.
            // 오프 -> 알람 제거
            // 온 -> 알람 등록
            // 데이터를 저장한다.
        }
알람이 켜진경우와 꺼진경우를 고려하여 각 상황에 맞는 코드를 구현하였다.
하단부에 알람켜기 알람끄기 버튼을 클릭하여 작동할 수 있는 이벤트를 만들어준다.
다음은 changeAlarmTimeButton 알람 버튼이 체인지 됐을때를 찾아본다.
private fun initChangeAlarmTimeButton(){
    val changeAlarmButton = findViewById<Button>(R.id.changeAlarmTimeButton)
    changeAlarmButton.setOnClickListener {

        val calender = java.util.Calendar.getInstance()
        // 현재 시간 가져온다. 캘린더 이용

        TimePickerDialog(this,{picker, hour, minute ->
            val model = saveAlarmModel(hour, minute, onOff = false)
            renderView(model)
            // 데이터를 저장한다.
            // 뷰를 업데이트 한다.

            cancelAlarm()


        }, calender.get(Calendar.HOUR_OF_DAY), calender.get(Calendar.MINUTE), false).show()
        // TimePcikDialog 띄어 주어 시간을 설정 하도록 하게끔 하고 시간을 가져온다.


        // 기존에 있던 알람을 삭제 한다.


    }
}
val calender = java.util.Calendar.getInstance()위의 기능을 이용하여 캘린더를 이용한 현재시간을 가져올 수 있다. 그리고 TimePickerDialog를 이용해 아래와 같이 가져올 수 있다.

ㅁ 위에서 설정한 시간 값을 이용해 AlarmModel에 값을 저장해준다. 여기서 sharedPreferences를 이용한다.
SharedPreferences는 간단한 값을 저장할 때 주로 사용한다. 초기 설정 값이나 자동 로그인 여부 등 간단한 값을 저장할 때 DB를 사용하면 복잡하기 때문에 SharedPreferences를 사용하면 적합하다.
SharedPreferences는 어플리케이션에 파일 형태로 데이터를 저장한다. 데이터는 (key, value) 형태로 data/data/패키지명/shared_prefs 폴더 안에 xml 파일로 저장된다. 해당 파일은 어플리케이션이 삭제되기 전까지 보존된다.
SharedPreferences란 앱의 어디서든 전역적으로 사용하기 때문에 싱글톤 패턴을 사용해서 어디서든 접근 가능하게 만드는 것이 좋다.
SharedPreferences 클래스는 앱에 있는 다른 액티비티보다 먼저 생성되어야 다른 곳에 데이터를 넘겨줄 수 있다. 이러기 위해서는 Application에 해당하는 클래스를 생성한 뒤, 전역 변수로 SharedPreferences를 가지고 있어야 한다. Application()을 상속받는 MyApplication 클래스를 생성하여, onCreate()보다 먼저 prefs를 초기화 해준다.
private fun saveAlarmModel(hour : Int, minute : Int, onOff : Boolean) : AlarmDisplayModel {
    val model = AlarmDisplayModel(
        hour = hour,
        minute = minute,
        onOff = onOff
    ) // 처음으로 알람 설정 값이므로 false를 해준다.

    val sharedPreferences = getSharedPreferences("time", Context.MODE_PRIVATE)

    with(sharedPreferences.edit()){
        putString(ALARM_KEY, model.makeDataForDB())
        putBoolean(ONOFFKEY, model.onOff)
        commit() // with로 작성했으므로 commit()실행을 해준다.
    }

    return model
}
여기서 saveAlarmModel을 만든 뒤 renderView를 통해 저장된 모델을 view에 보이게 해준다.
private fun renderView(model: AlarmDisplayModel){
    findViewById<TextView>(R.id.ampmTextView).apply {
        text = model.ampmText
    }

    findViewById<TextView>(R.id.timeTextView).apply {
        text = model.timeText
    }

    findViewById<Button>(R.id.onOffButton).apply {
        text = model.onOffText
        tag = model
    }
}
그러면 view에 적용되고 시간이 되면 notification으로 알림이 오게 된다.
